Automation has been a large part of my career as a consultant. Small scripts to solve mundane tasks during user logon or Windows startup is a way of automating tasks, another way is to install or configure Windows and applications in Windows. Speaking of applications, make sure to read my article about how to deploy and configure the Global Secure Access Client using Microsoft Intune and Powershell AppDeploy Toolkit.
As I have been working with Global Secure Access for quite some time, I wanted to explore the possibilities of automating certain elements of Global Secure Access, specifically the application creation part. Creating an application in Global Secure Access involves a certain level of clicking around in the Entra admin center portal and if you are creating a lot of applications it may become a bit tedious using the manual approach. If you are just starting with Global Secure Access make sure to read my article about how to get started with Global Secure Access, this will among other things, cover how to manually create an application in the Entra admin center.
I was recently on an assignment which brought me out of my comfort zone, a good thing to do from time to time as it may provide new ways of looking at certain tasks or maybe even learn new stuff, for me it was the latter. In this case the assignment was to provide information about how to create, update and delete a Global Secure Access Private Access application using the Microsoft Graph API.
Before this assignment, I had never worked with the Microsoft Graph API or any other API for that matter, so this was completely unknown territory for me. I was not able to find much information about how to approach the task of creating, updating and deleting Global Secure Access Private Access applications, using Microsoft Graph API. However, using the documentation provided by Microsoft on the Graph API, I was able to at least get a sense of what to do and how to approach it.
In this article I have gathered and documented what I have learned about Microsoft Graph API and how to use the API with Global Secure Access Private Access. I’ll provide Powershell scripts to create, update and delete a Private Access application.
Before going any further, I want to mention that Powershell modules to manage Global Secure Access Private Access do exist and you can find more information about the module and commands on the Global Secure Access – Community Resources Hub.
Microsoft Graph API communication
Prerequisites
Global Secure Access must be initialized and configured, and you must have at lease one active connector group before going any further.
Create app registration
To securely communicate with your Microsoft Entra tenant using the Microsoft Graph API, you can use an app registration with a limited set of permissions.
To create an app registration go to app registrations in the Entra admin center:
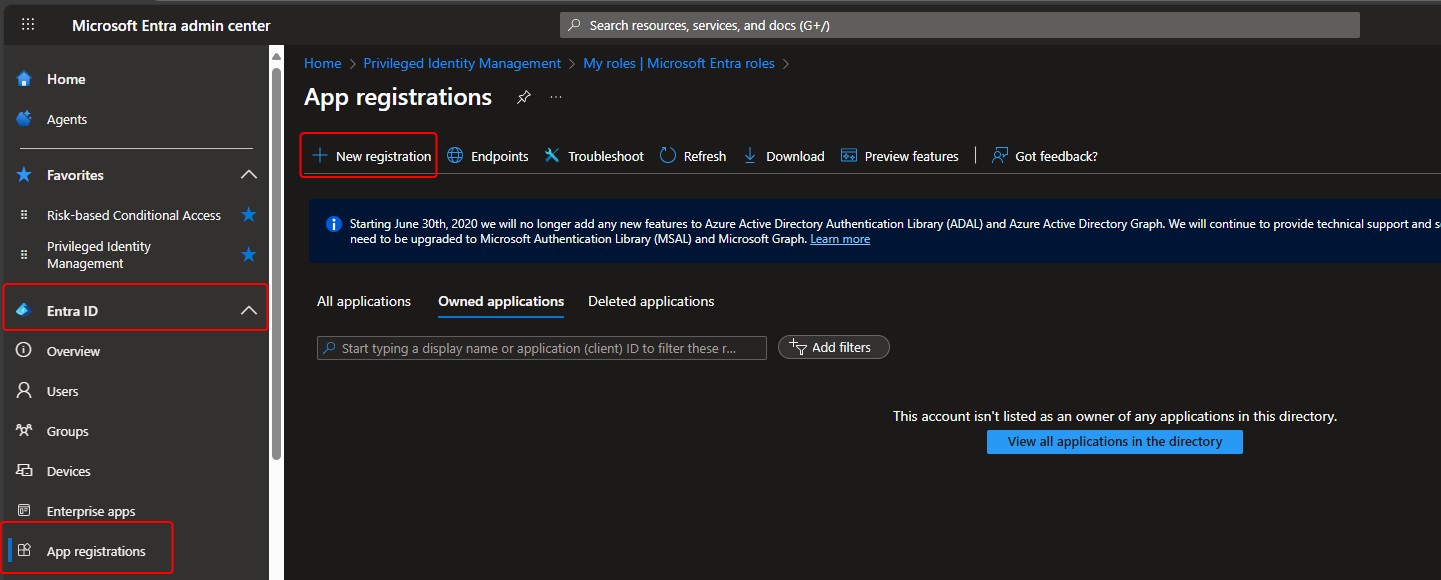
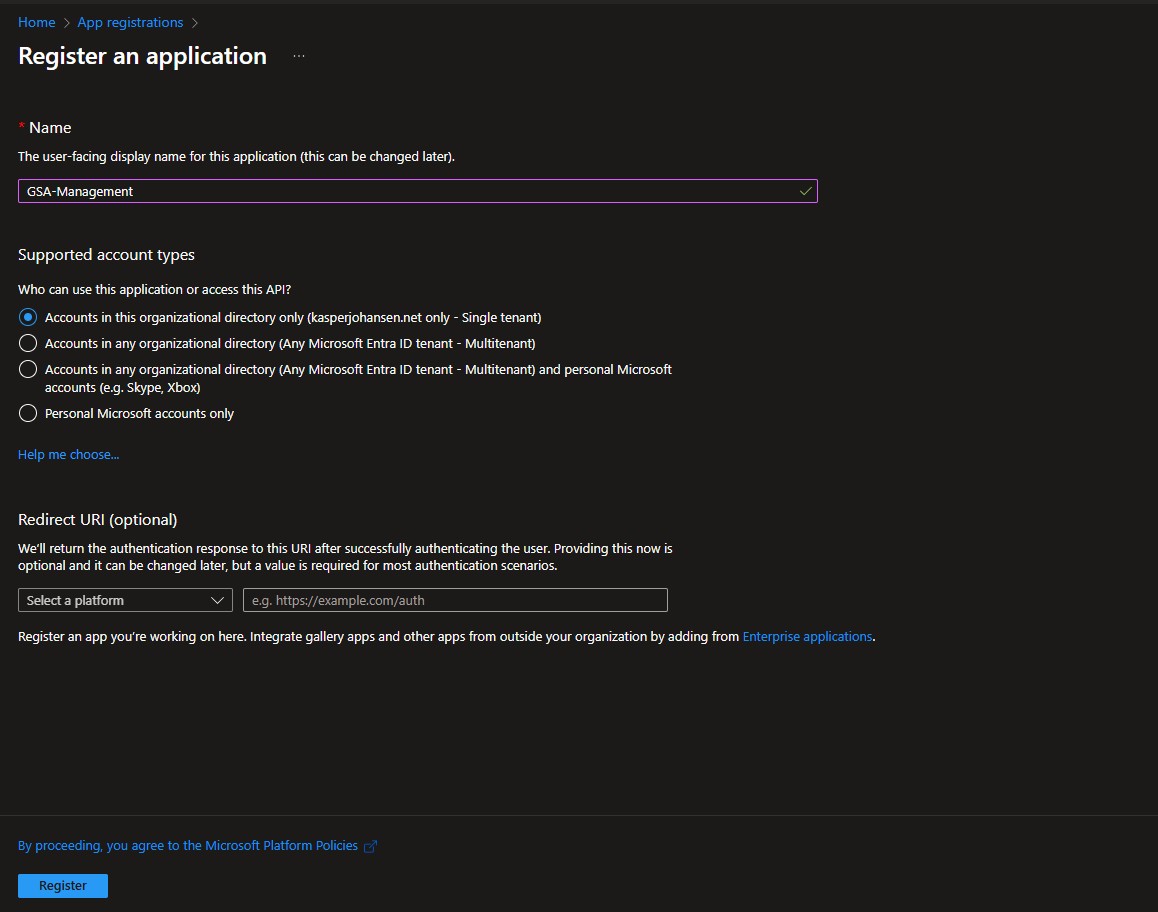
Click new registration and provide a name and then click register

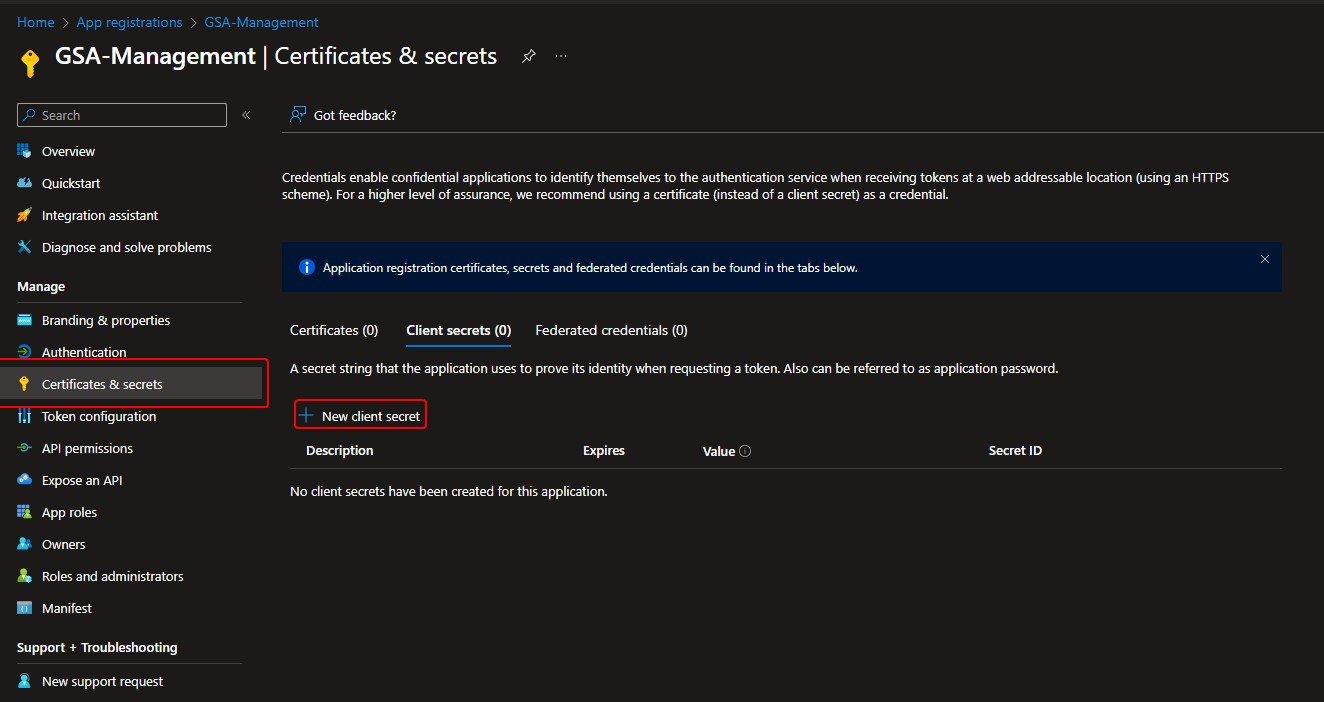
Make a note of the application id, we are going to need that later. Click certificates and secrets and click new client secret
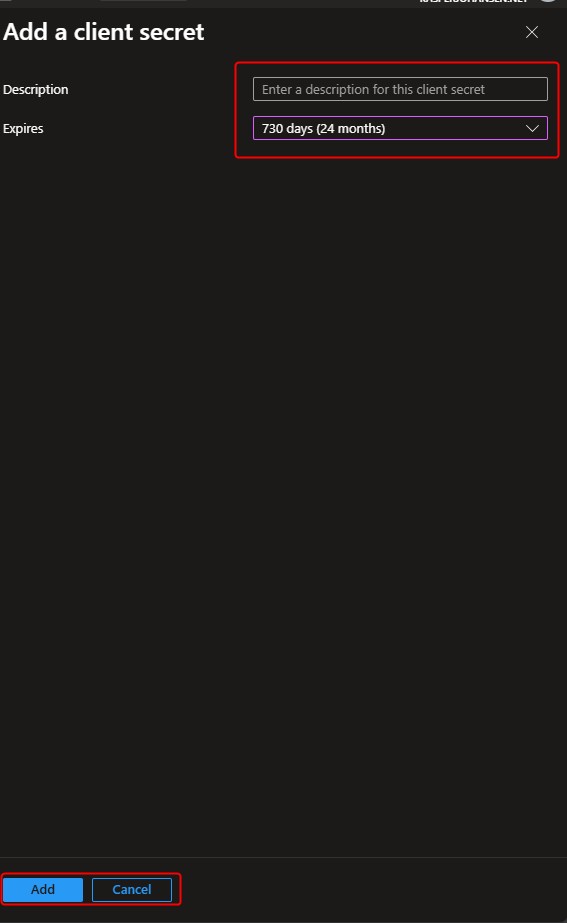
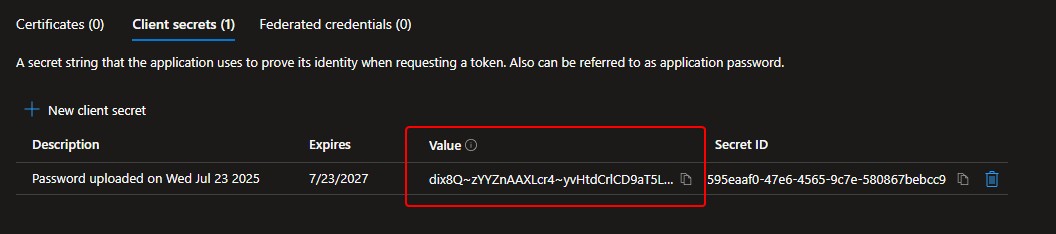
Select when the client secret should expire. Make a note of the client secret now, it will only be visible this one time.
Make sure to store your client secret in a safe location!
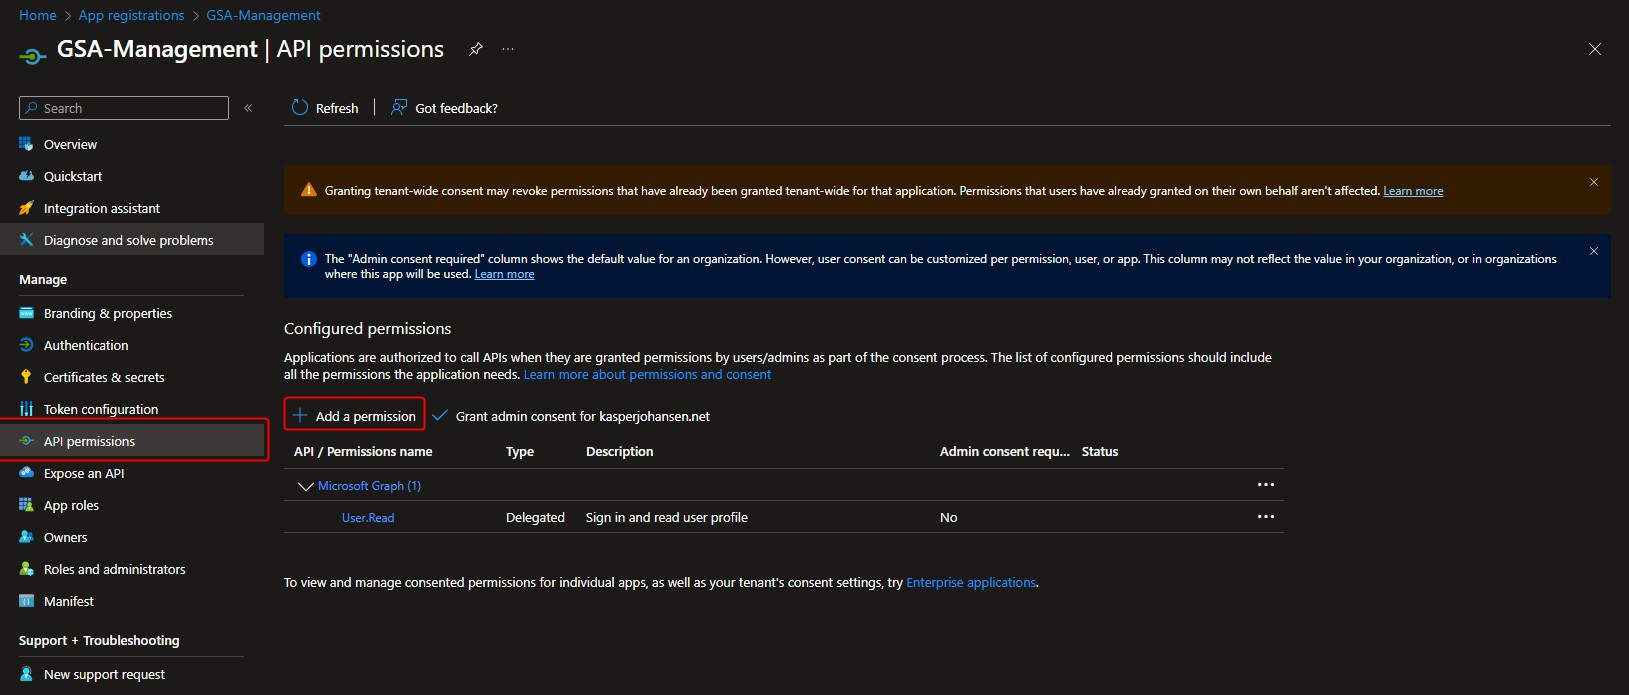
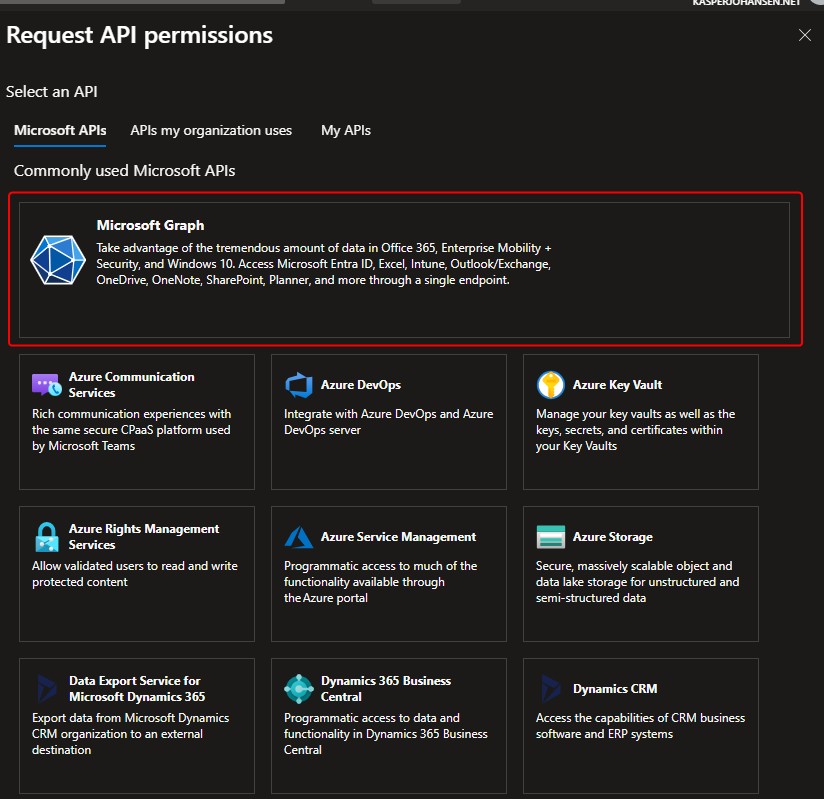
The last thing we need to do is to add permissions to the app registration. Click API permissions, Add permissions and select Microsoft Graph
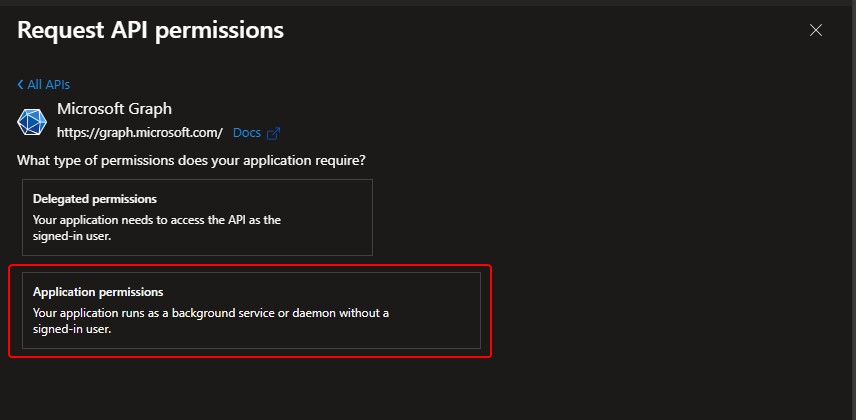
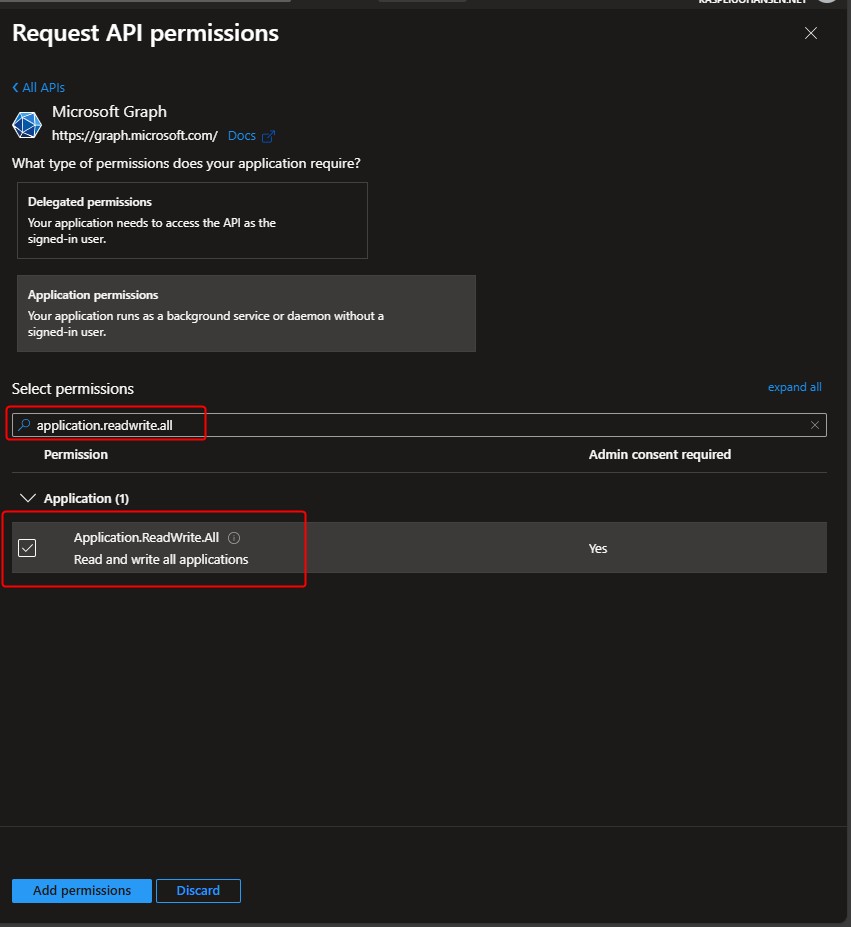
Click Application permissions. In the select permissions search box type Application.ReadWrite.All and select it in the box below the search box.
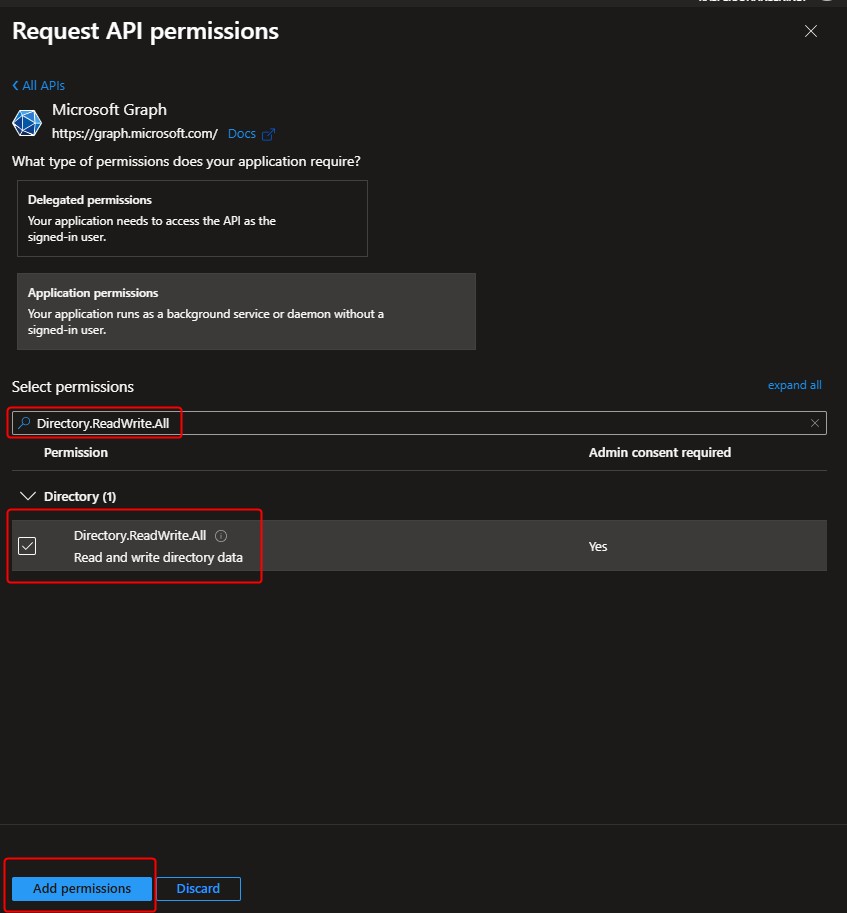
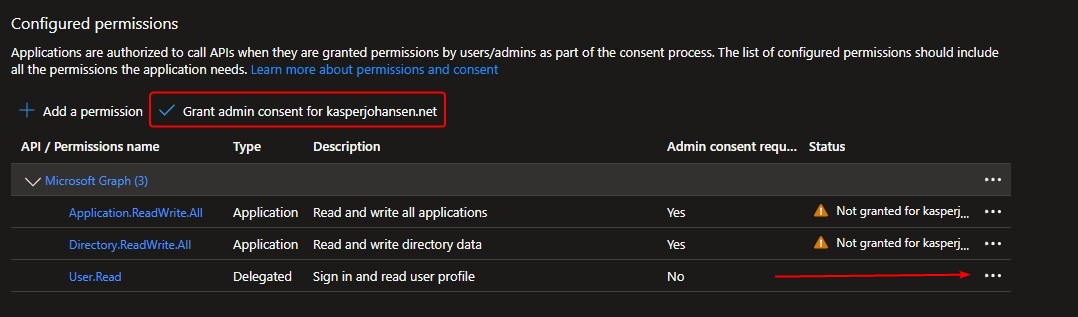
Return to the search box and type Directory.ReadWrite.All and select it in the box below the search box and click add permissions. The configured permissions should look like the second image. Make sure to remove the User.Read permissions via the 3 small dots. Next click Grant admin consent.
The Grant admin consent requires privileged permissions in the tenant, like the Privileged ROle Administrator or Global Administrator.
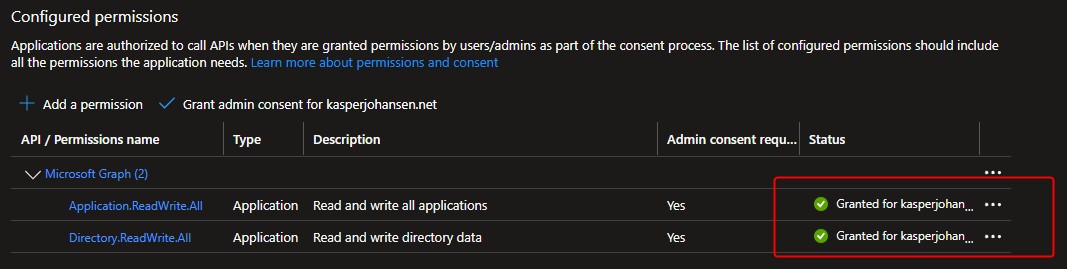
The end result should look like this.
Get API access token
Using the app registration application (client) ID and our newly created client secret, we can now create a $body variable, this variable will become handy in the next step.
$clientID = ""
$ClientSecret = ""
$body = @{
    client_id = $clientID
    client_secret = $ClientSecret
    scope = "https://graph.microsoft.com/.default"
    grant_type = "client_credentials"
}
$tenantID = ""
$TokenEndpoint = "https://login.microsoft.com/$tenantId/oauth2/v2.0/token"
$tokenResponse = Invoke-RestMethod -Uri $TokenEndpoint -Method POST -Body $body -ContentType "application/x-www-form-urlencoded"
$AccessToken = $tokenResponse.access_token
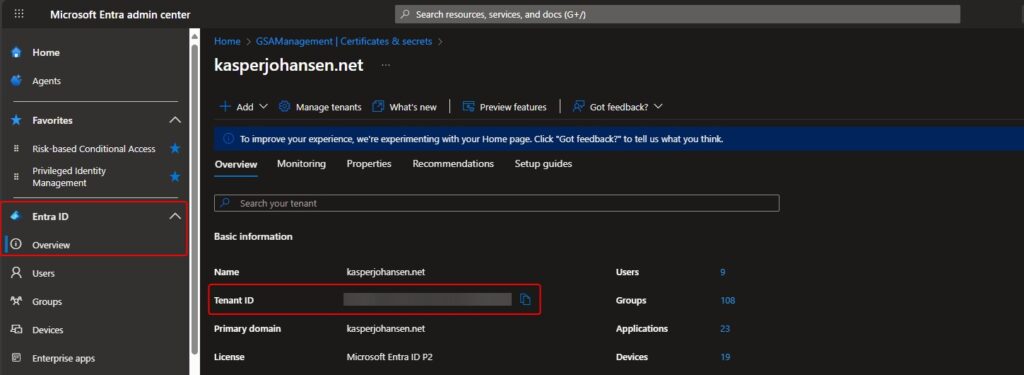
The $TenantID variable must contain the Tenant ID of your Entra ID. You can find the tenant ID here:
Create HTTP headers
With the $body variable in place, we’ll now create a $Headers variable containing an access token to authorize the communication with Entra ID using the app registration and the content-type which in this case is application/json.
$Headers = @{
    Authorization = "Bearer $AccessToken"
    "Content-Type" = "application/json"
}
With this, we are now ready to create an application.
Create a Private Access application
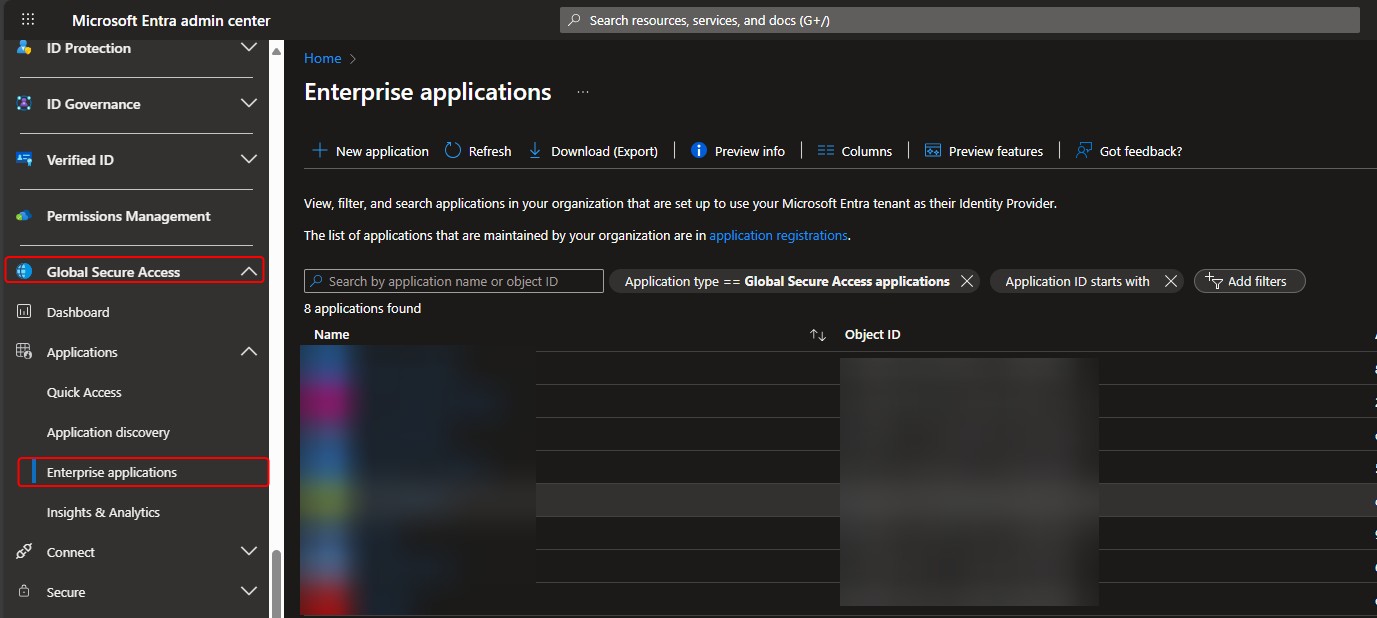
Now that we have the prequisites sorted, we can now create an application called “New File Server”. Applications in Global Secure Access is located here:
Create an application instance
Again, we’ll start with creating a $body variable:
$ApplicationName = "New File Server"
$Body = @{
    displayName = $ApplicationName
} | ConvertTo-Json -Depth 99 -Compress
The $ApplicationName variable must contain the name of the application, e.g. “New File Server”.
Next step is to create an array of parameters in the $params variable. This array contains the Method, Uri, Headers and Body.
Method is “Post” which means create. The Uri, in this case, refers to the Enterprise application template to be used to create the new application. Headers refers to the $Headers variable created earlier, and Body refers to the $Body variable created above and in this case the Body is converted to JSON using the ConvertTo-Json command.
$params = @{
    Method  = 'POST'
    Uri = 'https://graph.microsoft.com/beta/applicationTemplates/8adf8e6e-67b2-4cf2-a259-e3dc5476c621/instantiate'
    Headers = $Headers
    Body = $Body
}
$newApp = Invoke-RestMethod @params
Using the command Invoke-RestMethod @params will communicate with the Microsoft Graph API and create the application.
Here the Invoke-RestMethod @params is called via a variable, as we’ll need the object id of our newly created application.
Next step is to configure the application to be accessible via Global Secure Access Private Access.
$newAppId = $newApp.application.objectId
$body = @{
    onPremisesPublishing = @{
        applicationType = "nonwebapp"
        isAccessibleViaZTNAClient = "true"
    }
} | ConvertTo-Json -Depth 99 -Compress

$params = @{
    Method = 'PATCH'
    Uri = "https://graph.microsoft.com/beta/applications/$newAppId"
    Headers = $Headers
    Body = $body
}
Invoke-RestMethod @params
The $newAppid variable is used to get the object id of the new application created. The $Body contents will enable the new application to be accessible via Private Access. In the $params variable the Method is “Patch” this is because we are modifying or changing an existing application. The Uri points to the URL of the new application. As before, the Headers contain the $Headers and Body contain the $Body
Create application segment
Now we are ready to configure the application segment which enables access to the on-prem resource/resources.
Again, we’ll configure the $Body must contain the destinationHost, protocol, ports and destinationType.
Here I am configuring access to the FQDN “srvfile.domain.com” on port 445 tcp.
$body = @{
        destinationHost = "srvfile.domain.com"
        protocol = "tcp"
        ports = @('445-445')
        destinationType = "fqdn"
} | ConvertTo-Json -Depth 99 -Compress

$params = @{
        Method = 'POST'
        Uri = "https://graph.microsoft.com/beta/applications/$newAppId/onPremisesPublishing/segmentsConfiguration/microsoft.graph.ipSegmentConfiguration/applicationSegments"
        Headers = $Headers
        Body = $body
}
Invoke-RestMethod @params
The Method is “Post” as we are creating a new application segment the URI contain the URL to the applicationSegments in the application object id specified by the $newAppId earlier.
Assign a connector group
The assignment of a connector group is only needed, if you have more than one connector group. If you only have one connector group, this will be the default connector group selected when creating a new application.
$ConnectorGroupName = "Default"
$ConnectorGroupId = (Invoke-RestMethod -Method Get -Uri "https://graph.microsoft.com/beta/onPremisesPublishingProfiles/applicationproxy/connectorGroups?`$Filter=name eq '$ConnectorGroupName'" -Headers $Headers).Value.Id

$Body = @{
    "@odata.id" = "https://graph.microsoft.com/beta/onPremisesPublishingProfiles/applicationproxy/connectorGroups/$ConnectorGroupId"
} | ConvertTo-Json -Depth 99 -Compress

$params = @{
        Method  = 'PUT'
        Uri     = "https://graph.microsoft.com/beta/applications/$newAppId/connectorGroup/`$ref"
        Headers = $Headers
        Body    = $Body
}
Invoke-RestMethod @params
The $ConnectorgroupName variable must contain the name of the Connector Group, in this case it’s “Default”
Again, a $Body is created with the Connector Group Id and converted to JSON. A $params variable is created with the Method “Put” this is because we want to replace the current Connector Group name. The Uri must have this $ref at the end, I have not been able to find out why.
Complete script to create an application using Microsoft Graph API
You can find a complete script to create a new application using Microsoft Graph API in my Gihub repo here:
Global-Secure-Access-Scripts/Global Secure Access Graph API/Create New Application.ps1 at main · kaspersmjohansen/Global-Secure-Access-Scripts
Update Private Access application
Using Microsoft Graph API we can of course also modify/update an existing application and existing application segment. Below are examples of how to rename an existing application and how to modify an existing application segment.
By now I hope you have a good understanding of how to work with the Microsoft Graph API as the next sections will not be as detailed as the section about creating an application.
Update application instance name
Here is how to rename an existing application.
ApplicationName = "New File Server"
$NewApplicationName = "Brand new File Server"

$params = @{
    Method = 'Get'
    Uri = "https://graph.microsoft.com/beta/applications?`$Filter=displayname eq '$ApplicationName'"
    Headers = $Headers
}
$App = Invoke-RestMethod @params
$AppId = $App.value.id

$Body = @{
    displayName = $NewApplicationName
} | ConvertTo-Json -Depth 99 -Compress

$params = @{
    Method = 'PATCH'
    Uri = "https://graph.microsoft.com/beta/applications/$AppId"
    Headers = $Headers
    Body = $body
}
Invoke-RestMethod @params
We are getting a bit more advanced here. The $ApplicationName variable must contain the name of the application you want to rename. The $NewApplicationName must contain the new application name.
Next, with a few additional lines of code, we will have a script to rename an existing application.
Update application segment
Here is how to update/modify an existing application segment with an additional port.
$ApplicationName = "New File Server"
$params = @{
    Method = 'Get'
    Uri = "https://graph.microsoft.com/beta/applications/?`$Filter=displayname eq '$ApplicationName'"
    Headers = $Headers
}
$App = Invoke-RestMethod @params
$AppId = $App.value.id

$ApplicationSegmentName = "srvfile.domain.com"
$params = @{
    Method = 'Get'
    Uri = "https://graph.microsoft.com/beta/applications/$AppId/onPremisesPublishing/segmentsConfiguration/microsoft.graph.IpSegmentConfiguration/ApplicationSegments?`$Filter=destinationHost eq '$ApplicationSegmentName'"
    Headers = $Headers
}
$AppSegment = Invoke-RestMethod @params
$AppSegmentId = $AppSegment.value.id

$body = @{
        ports = @('445-445','3389-3389')
} | ConvertTo-Json -Depth 99 -Compress

$params = @{
    Method = 'Patch'
    Uri = "https://graph.microsoft.com/beta/applications/$AppId/onPremisesPublishing/segmentsConfiguration/microsoft.graph.IpSegmentConfiguration/ApplicationSegments/$AppSegmentId"
    Headers = $Headers
    Body = $body
}
Staying in the more advanced path here. The $ApplicationName must contain the name of the application where you want to update/modify an application segment. The $ApplicationSegmentName must contain the name of the application segment.
The $Body must contain the property you want to change, in this case it is the “ports” property where we are adding port 3389, so that the application segment contains both port 445 and 3389.
Be aware that the body may only contain one property, which means you can’t have both ports and protocols in the body, you must create an additional body for the protocol value.
Delete Private Access application
Using Microsoft Graph API we can also delete an existing application and application segment. Below are examples of how to delete an existing application and delete an existing application segment.
Delete application instance
Here is how to delete an existing application.
$ApplicationName = "New File Server"
$params = @{
    Method = 'Get'
    Uri = "https://graph.microsoft.com/beta/applications/?`$Filter=displayname eq '$ApplicationName'"
    Headers = $Headers
}
$App = Invoke-RestMethod @params
$AppId = $App.value.id

$params = @{
    Method = 'Delete'
    Uri = "https://graph.microsoft.com/beta/applications/$AppId"
    Headers = $Headers
}
Invoke-RestMethod @params
The $ApplicationName must contain the name of the application where you want to delete.
Delete application segment
$ApplicationName = "New File Server"
$params = @{
    Method = 'Get'
    Uri = "https://graph.microsoft.com/beta/applications/?`$Filter=displayname eq '$ApplicationName'"
    Headers = $Headers
}
$App = Invoke-RestMethod @params
$AppId = $App.value.id

$ApplicationSegmentName = "srvfile.domain.com"
$params = @{
    Method = 'Get'
    Uri = "https://graph.microsoft.com/beta/applications/$AppId/onPremisesPublishing/segmentsConfiguration/microsoft.graph.IpSegmentConfiguration/ApplicationSegments?`$Filter=destinationHost eq '$ApplicationSegmentName'"
    Headers = $Headers
}
$AppSegment = Invoke-RestMethod @params
$AppSegmentId = $AppSegment.value.id

$params = @{
    Method = 'Delete'
    Uri = "https://graph.microsoft.com/beta/applications/$AppId/onPremisesPublishing/segmentsConfiguration/microsoft.graph.IpSegmentConfiguration/ApplicationSegments/$AppSegmentId"
    Headers = $Headers
}
Invoke-RestMethod @params
The $ApplicationName must contain the name of the application where you want to delete an application segment. The $ApplicationSegmentName must contain the name of the application segment.
This introduction to Microsoft Graph API has been very fun and informative even though my learning curve was very steep. Microsoft Graph API is another “tool” in my “automation toolbox” and it will certainly have more of my attention in the future.
This concludes the article. Feel free to reach out to me on X or on LinkedIn if you have any comments or questions.