Microsoft Connected Cache is a software caching solution created to easy the migration away from Config Manager to Intune. Connected Cache will create a local (on-prem) cache of Windows Updates and Win32 applications and using the Delivery Optimization feature, we can instruct Windows devices to download Windows Update and Intune content from the Connected Cache node instead of reaching out to our Intune tenant. This is useful in branch offices or the main HQ site if there is a limited bandwidth available.
Microsoft Connected Cache is currently in preview, which means that it’s currently a free solution. Be aware that Microsoft will probably make this a paid service once it’s no longer in preview.
Microsoft Connected Cache (MCC) is configured, managed and monitored in Microsoft Azure with local caching nodes ideally close to your Windows devices. These Microsoft Connected Caching nodes can be Windows 11 or Windows Server 2022 or later devices and because the MCC node agent/software is based on Linux code, Windows Subsystem for Linux is required in Windows. The MCC node can also run on native Linux hosts, currently Ubuntu 22.04 and Red Hat Enterprise Linux 8.x and 9.x are supporter.
Microsoft Connected Cache requirements
As Microsoft Connected Cache is currently in preview, the requirements listed below may change, make sure to stay up to date with any changes.
Licensing
- A valid Microsoft Azure subscription
- Microsoft 365 E3/E5 or A3/A5 for each device downloading content from the MCC node(s).
Hardware
Recommended at least 4 CPU, 8 GB RAM, 100 GB free disk storage and 1 Gbit NIC
Operating System
Windows
- Windows 11 23H2 or later
- Windows Server 2022 or later
- Windows Subsystem for Linux
- Host machine must support nested virtualization
Linux
- Ubuntu 22.04
- Red Hat Linux Enterprise 8.x or 9.x
- Default container must be replaced by Moby
Microsoft has a great article covering licensing and MCC Cache node requirements here – Microsoft Connected Cache for Enterprise and Education prerequisites | Microsoft Learn
Install and configure
As mentioned, most of the configuration and management of Microsoft Connected Cache is in the Microsoft Azure Portal. I haven’t been able to find any information regarding RBAC yet, hopefully they will be added to the documentation soon.
For the sake of this article, I am logged in with a user that has been assigned the global administrator and subscription owner roles.
Configure the MCC resource
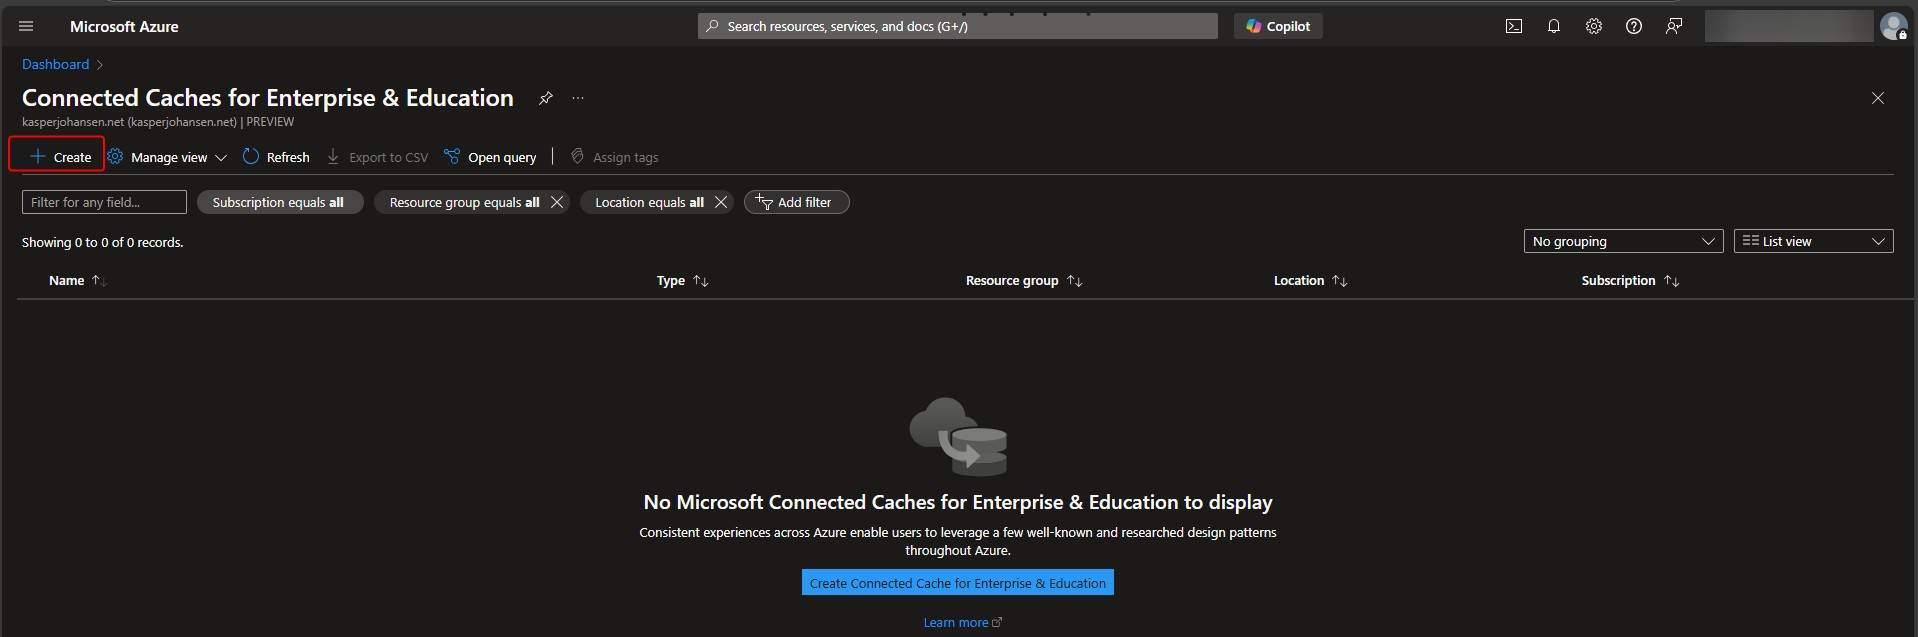
The first thing to do is to create the MCC service. The MCC service is where you’ll configure and monitor Cache Nodes.
Make a search for “Connected Cache” and select the Connected Cache for Enterprise and Education.

Next, click create:
This will start the “Create Connected Cache wizard.
Provide a valid Azure subscription, resource group, location and Connected Cache Resource name
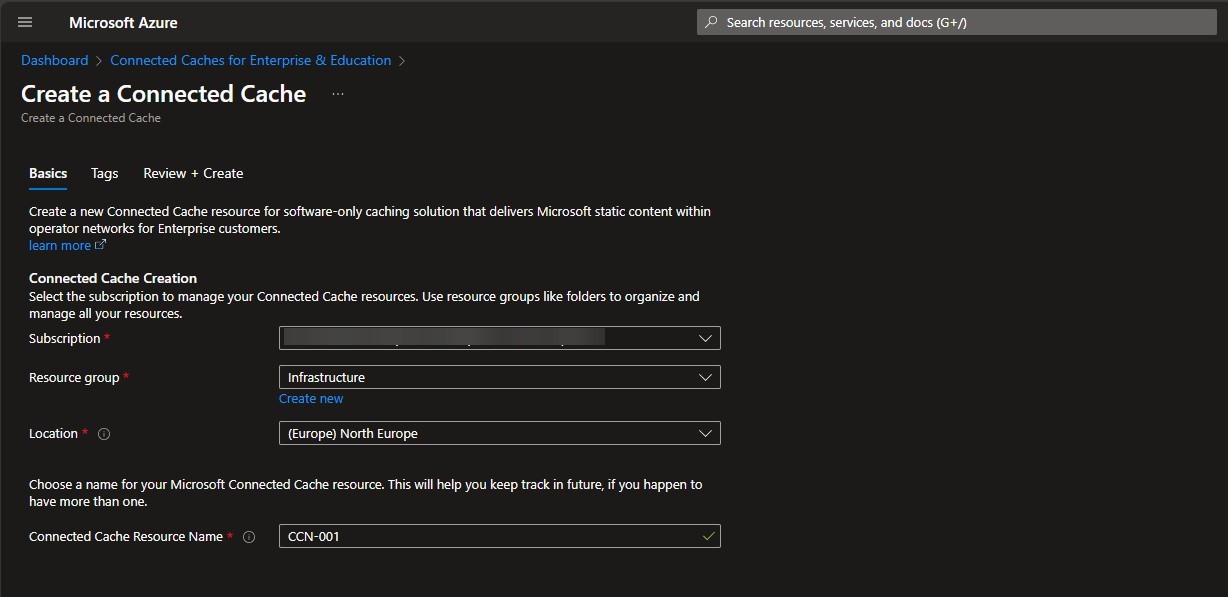
Currently there are only 3 locations available – Europe, Asia Pacific (Korea Central) and US (West US)
Provide a tag if needed, otherwise click Review + Create

If the validation is successful, the MCC Resource deployment will start.
The deployment should not take more than a couple of minutes:

When the deployment is complete, click “Go to resource”.
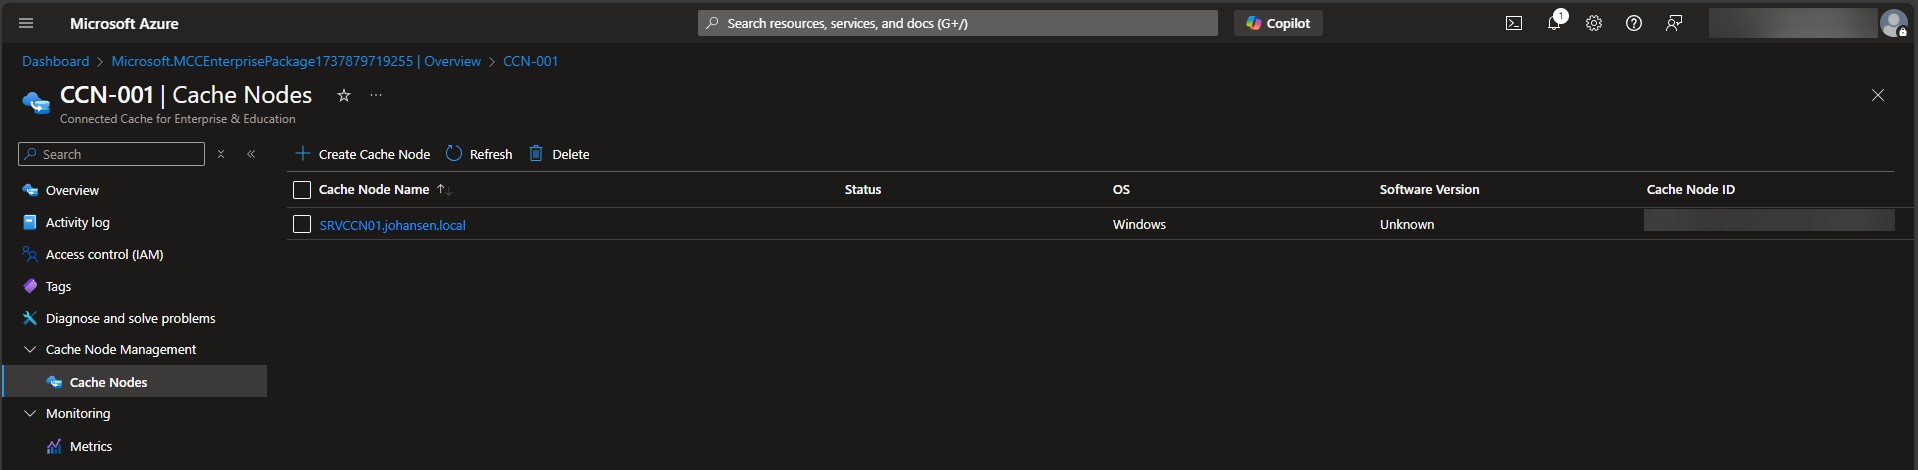
Now that we have the MCC resource up and running it’s time to create the Cache Node.
In Cache Node Management, click Cache Nodes:

Click Create Cache Node:

Provide a Cache Node name. In this example I have provided the FQDN of the Windows Server and an operating system.

Click Create
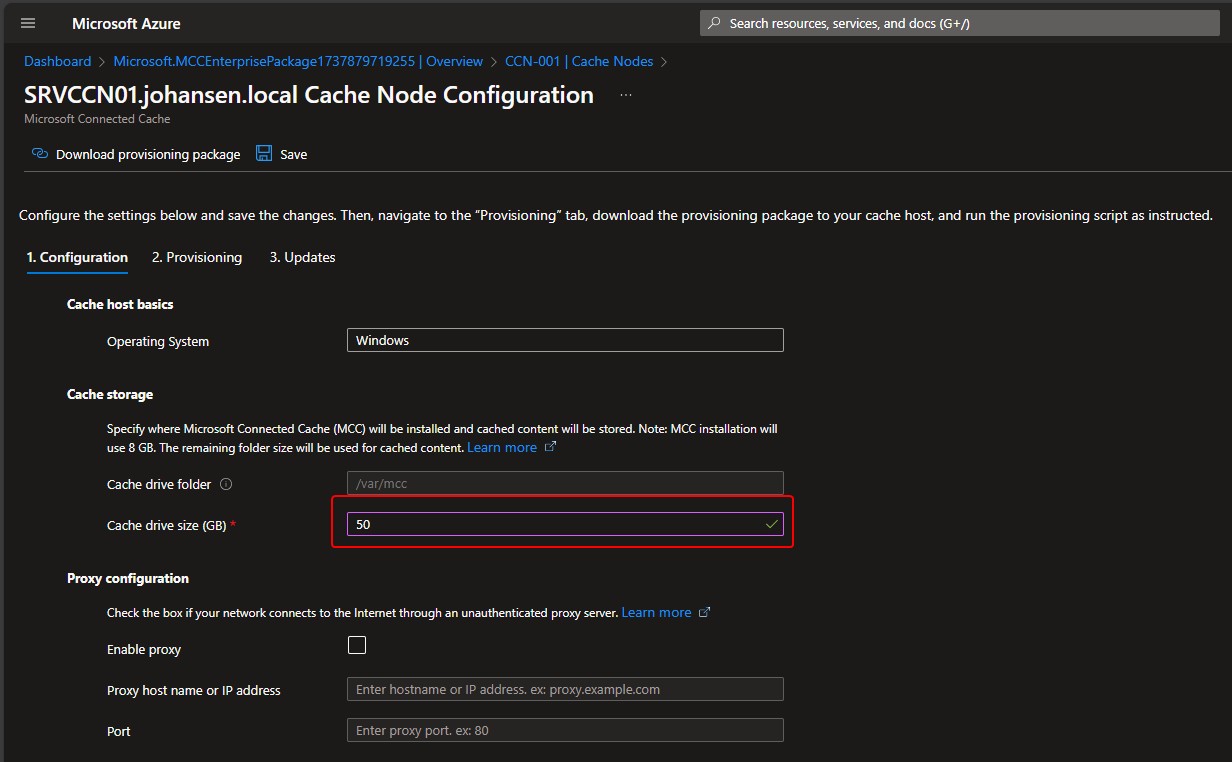
Click the Cache Node and configure the Cache drive size – This should be a minimum of 50 GB, otherwise the Cache Node deployment will fail.
Click Provisioning
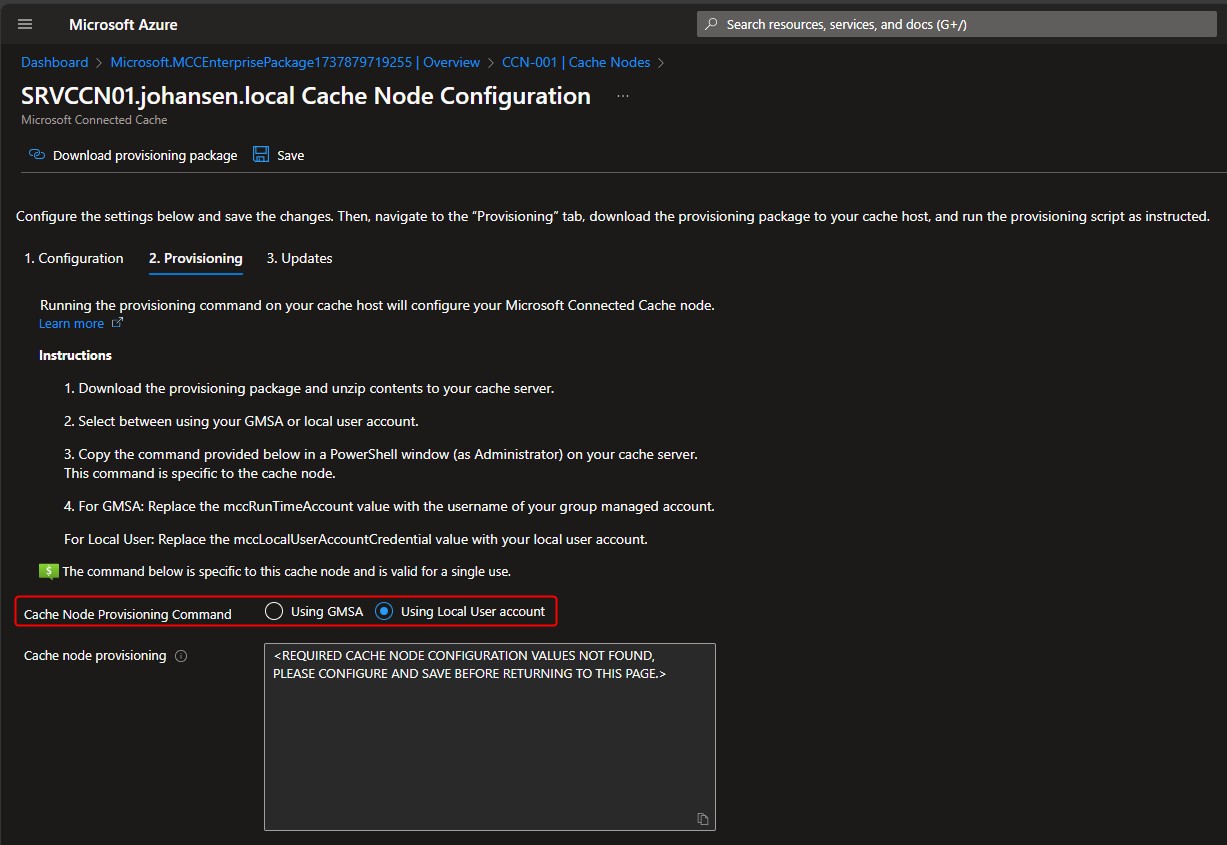
Select which type of user acount you want. In this case I have selected the Local User Account. However, in a production environment I would reccomend the Group Managed Service Account (GMSA).
Click Updates
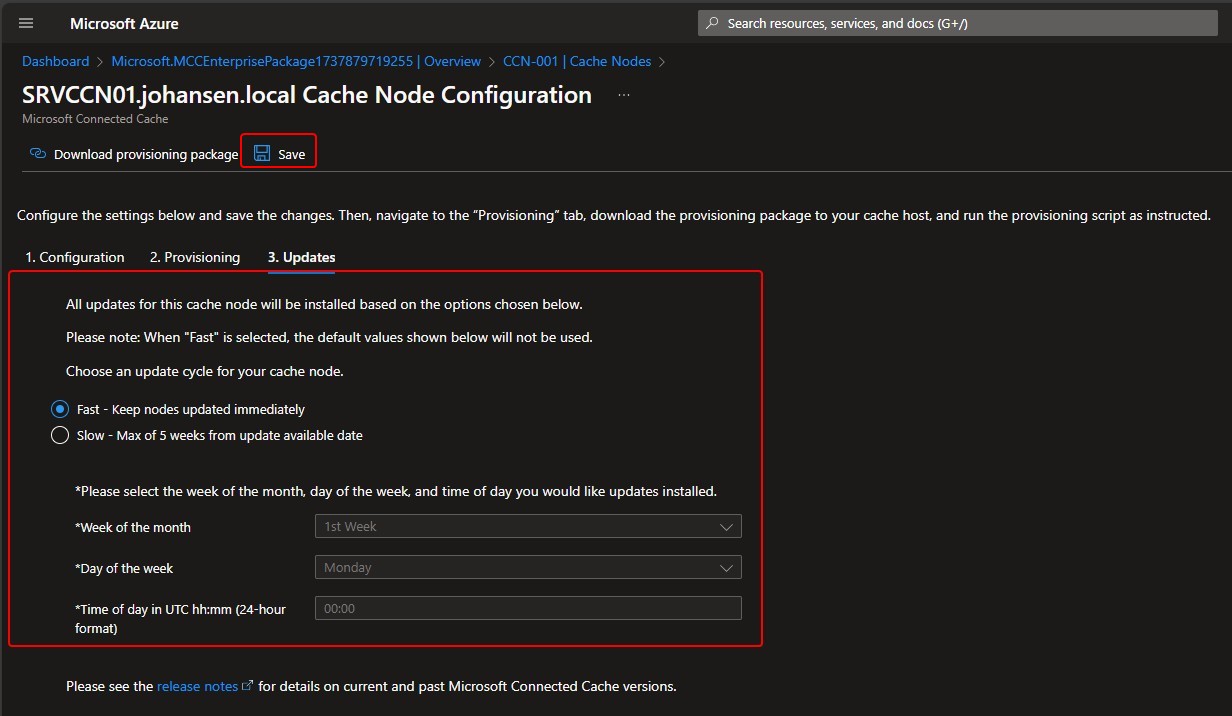
Select which update channel you want to use and click Save.
Go back to the Provisioning tab
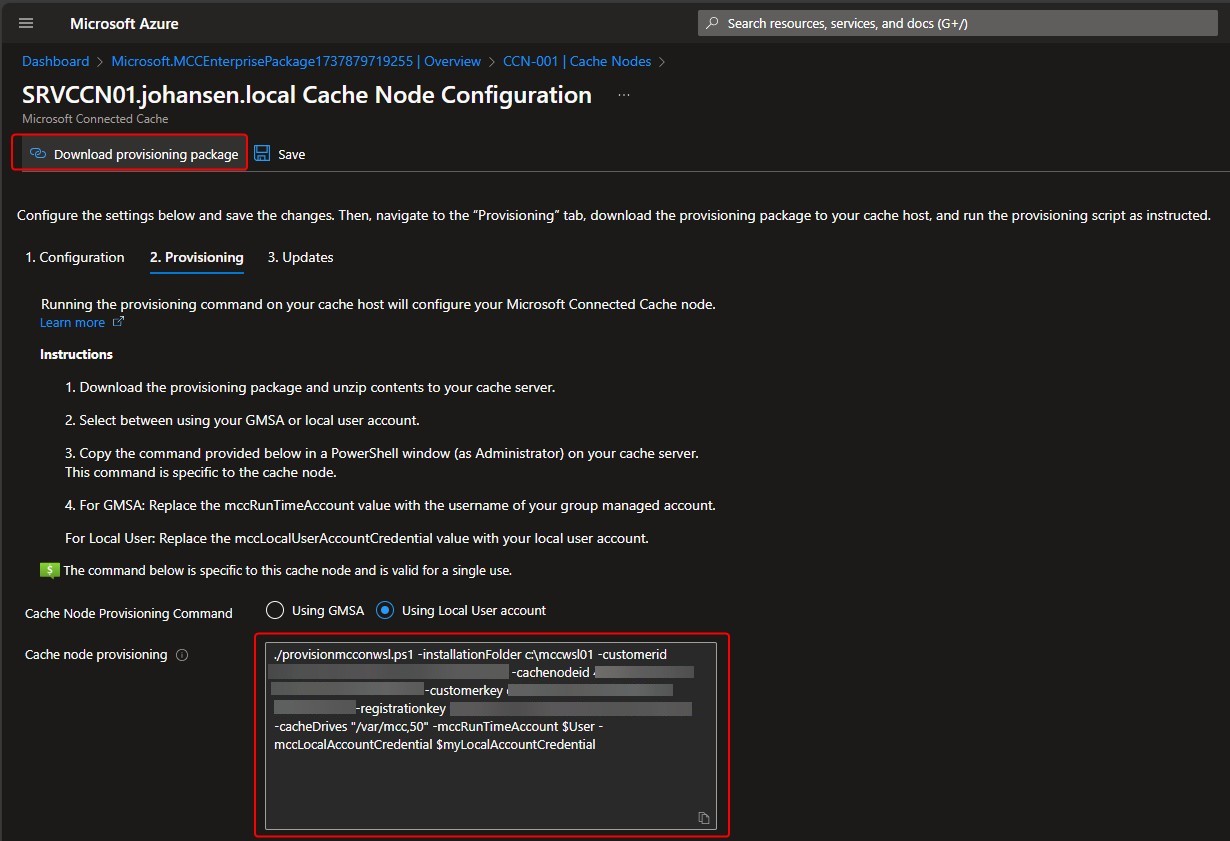
Download the provisioning package and copy the cache node provisioning command to the clipboard, you need it later.
Configure the MCC Cache Node
It’s recommended to have at least 2 MCC Cache nodes, for high availability. Microsoft will automatically keep the MCC Cache node software up-to-date, based on the update configuration selected earlier.
Configure the virtual machine in Hyper-V
If you plan to install the MCC Cache node software on a virtual machine, make sure to enable nested virtualization. There may be different procedures for how to enable this based on the hypervisor.
In this case I have created a virtual Windows Server 2022 Standard machine with 2 vCPUs, 8 GB RAM and 100 GB virtual hard disk, with nested virtualization in a Hyper-V 2022 host machine.
To enable nested virtualization in Hyper-V, execute this command:
Set-VMProcessor -VMName SRVCCN01 -ExposeVirtualizationExtensions $true
Adjust the VMName according to your environment.
Create local Windows account
As mentioned, a Group Managed Service Account (gMSA) or a local Windows account is needed. In this example, I am using a local Windows account called localccnaccount:
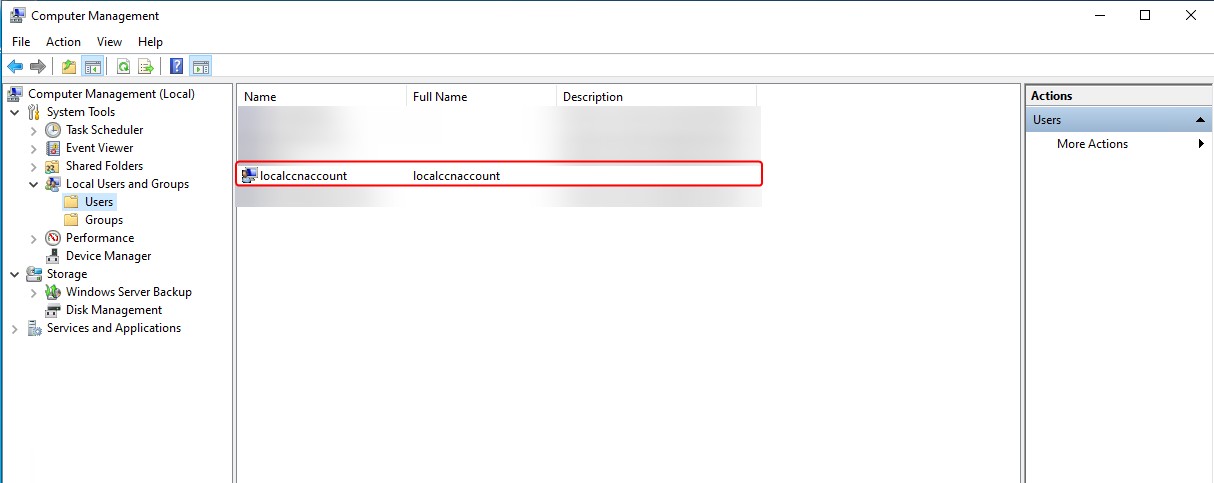
According to Microsoft the local Windows account must be granted the “Log on as a batch job” security permission. I have found, that currently this is not working. The local Windows account must be a member of the local Administrators group.
Enable Windows Subsystem for Linux
Launch a Powershell console as Administrator to install the Windows Subsystem for Linux (WSL) feature:

wsl --install
This may take a few minutes and it will require a reboot.

When the Windows Server is up and running again, you’ll see Ubuntu is being downloaded and installed.


Create a local UNIX user, in this case the user localadmin. Also, configure as password for the local user.

You should see a message saying Installation successful! and the WSL feature is now running. Exit the UBUNTU instance.
Install the MCC Cache node software
Next step is to extract the MCC-WSL-Installer zip file and install the MCC Cache node software in WSL:

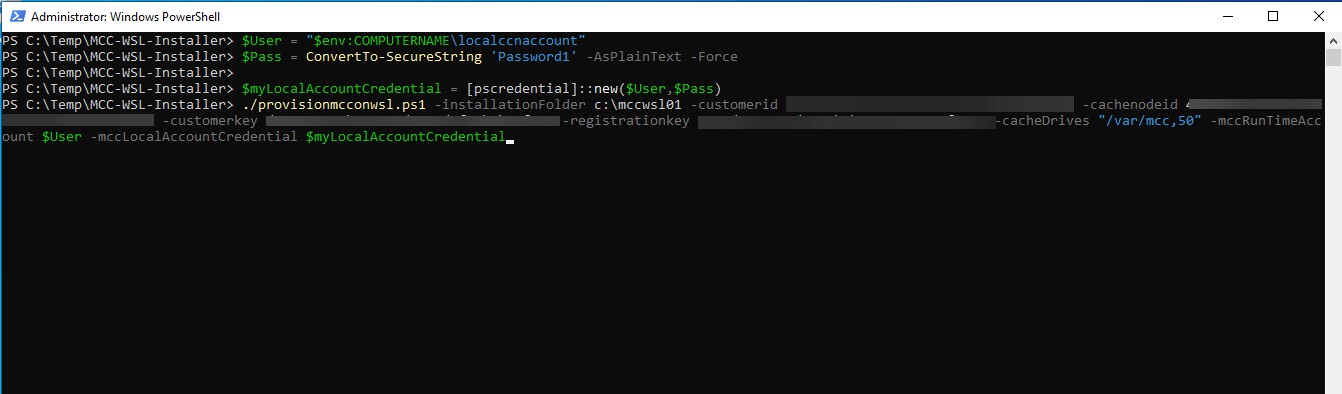
This small piece of code will create Powershell variables with the local Windows account username and password information. This will be used with the provisioning command to configure the local Windows account as the MCC Cache node service account. Adjust according to your needs. If you are using a gMSA account the variable $myLocalAccountCredential and $Pass are not needed.
$User = "$env:COMPUTERNAME\localccnaccount"
$Pass = ConvertTo-SecureString 'Password1' -AsPlainText -Force
$myLocalAccountCredential = [pscredential]::new($User,$Pass)
Next, paste the provisioning command:
You should now see the MCC Cache node software setup process:
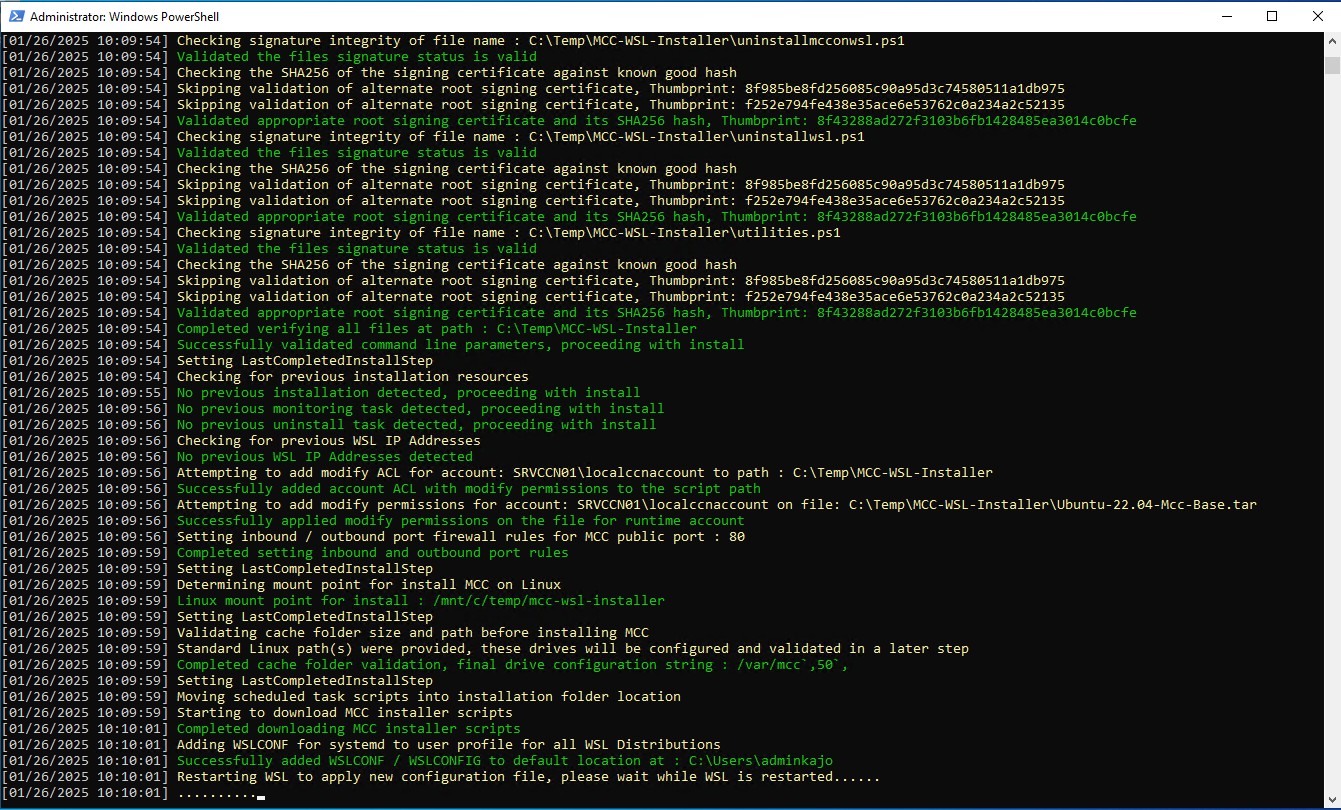
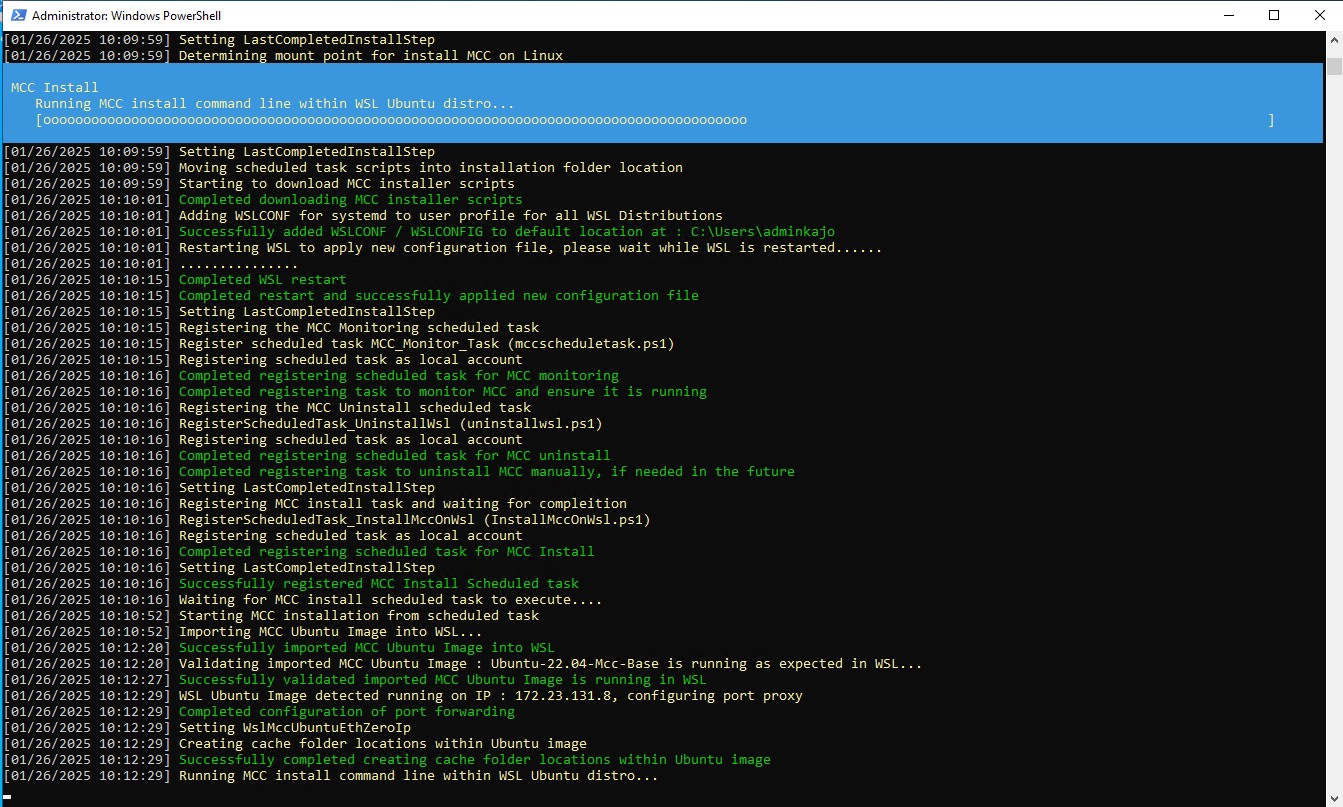
The setup process may take a few minutes to complete
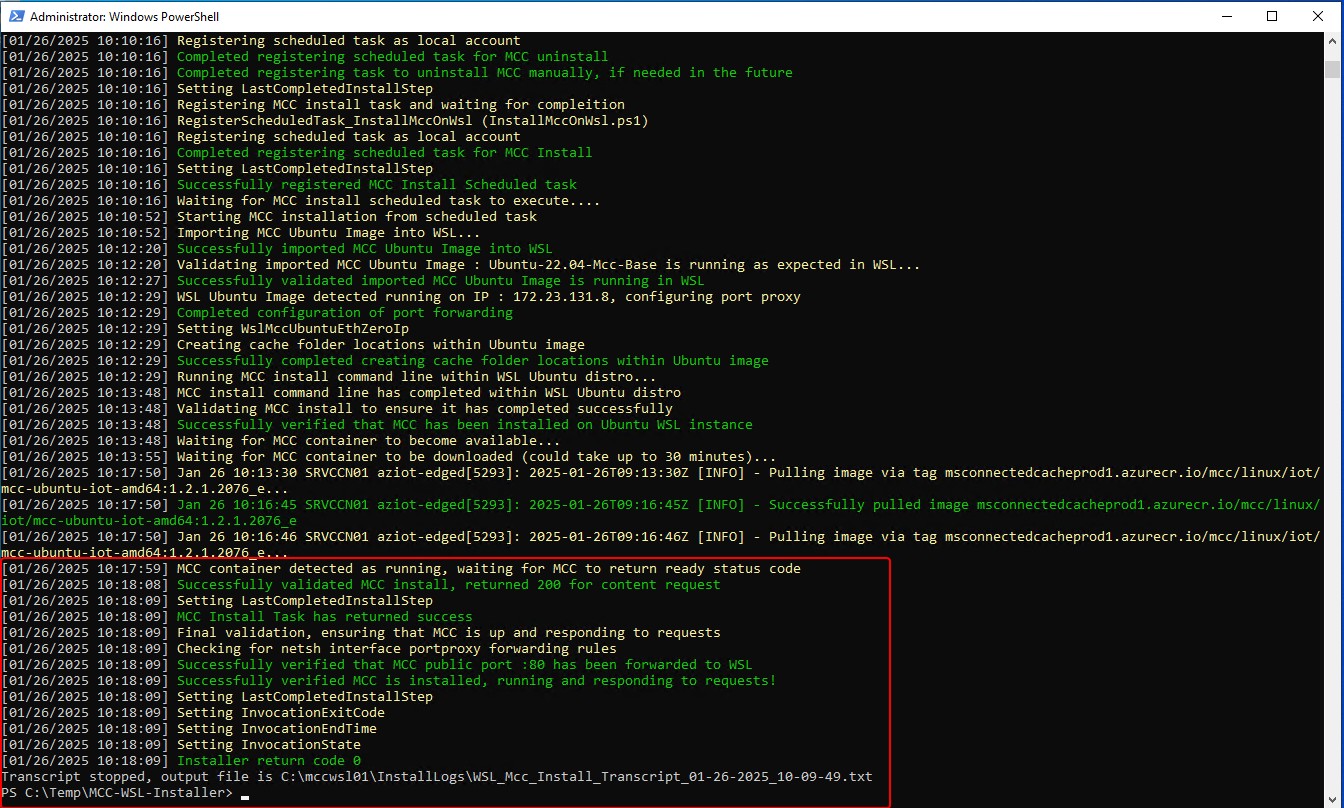
You’ll receive a message when the setup is completed. Even though it’s not stated, I have experienced that a reboot is needed otherwise the MCC Cache Node might not connect with the MCC Cache Resource service in Azure.
Verify that the MCC Cache Node is working
There are a couple of ways on the local Windows Server to verify that the MCC Cache node is working.
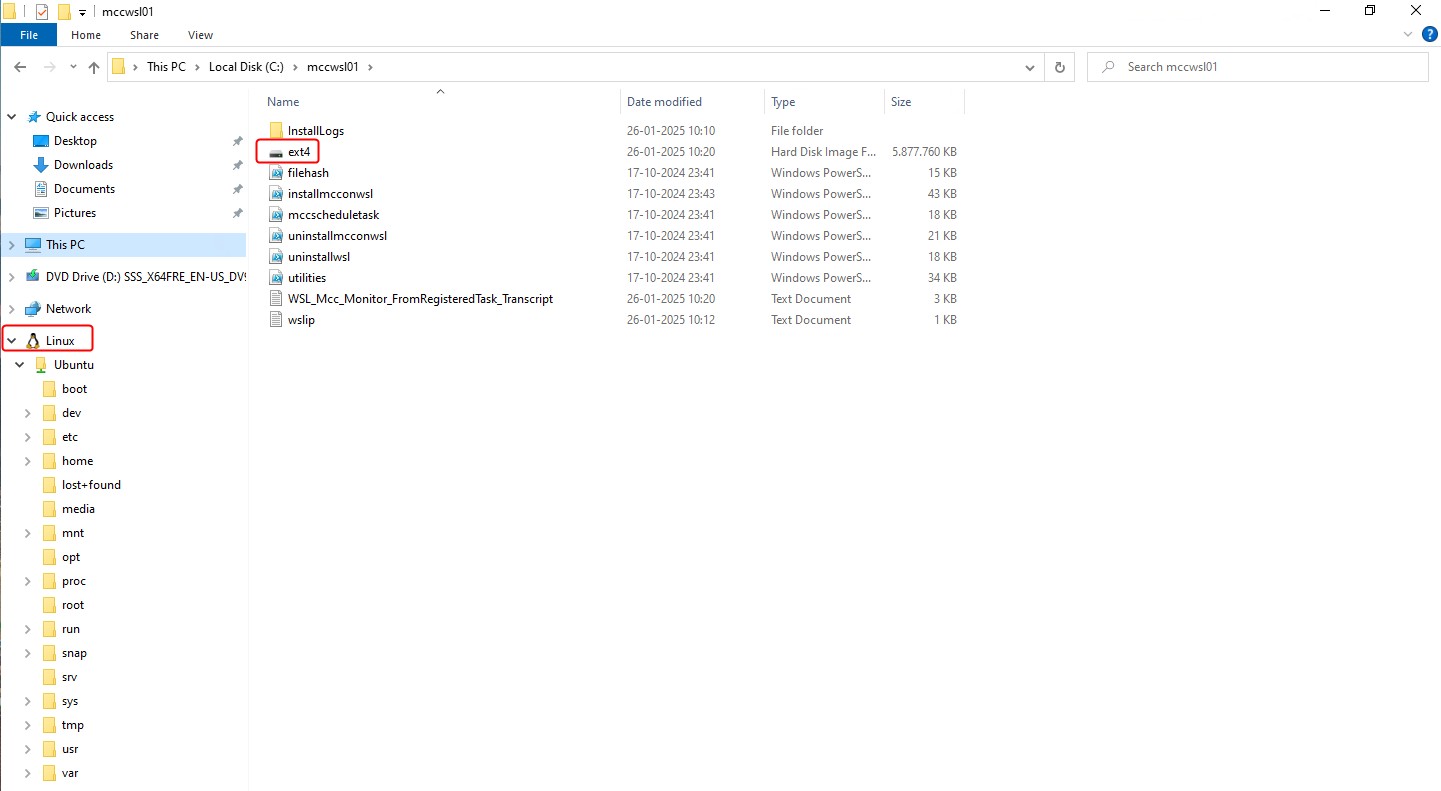
The first one is in File Explorer, you’ll see a Linux/Ubuntu library and a VHDX file called ext4, this means that the WSL is configured and running:
Next, using wget you can verify that the MCC Cache node is reachable:
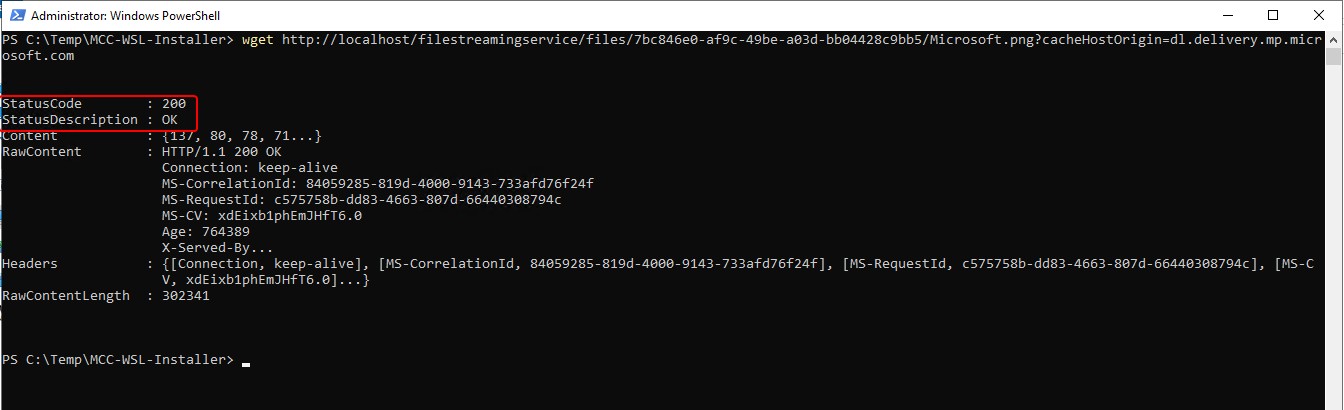
wget http://localhost/filestreamingservice/files/7bc846e0-af9c-49be-a03d-bb04428c9bb5/Microsoft.png?cacheHostOrigin=dl.delivery.mp.microsoft.com
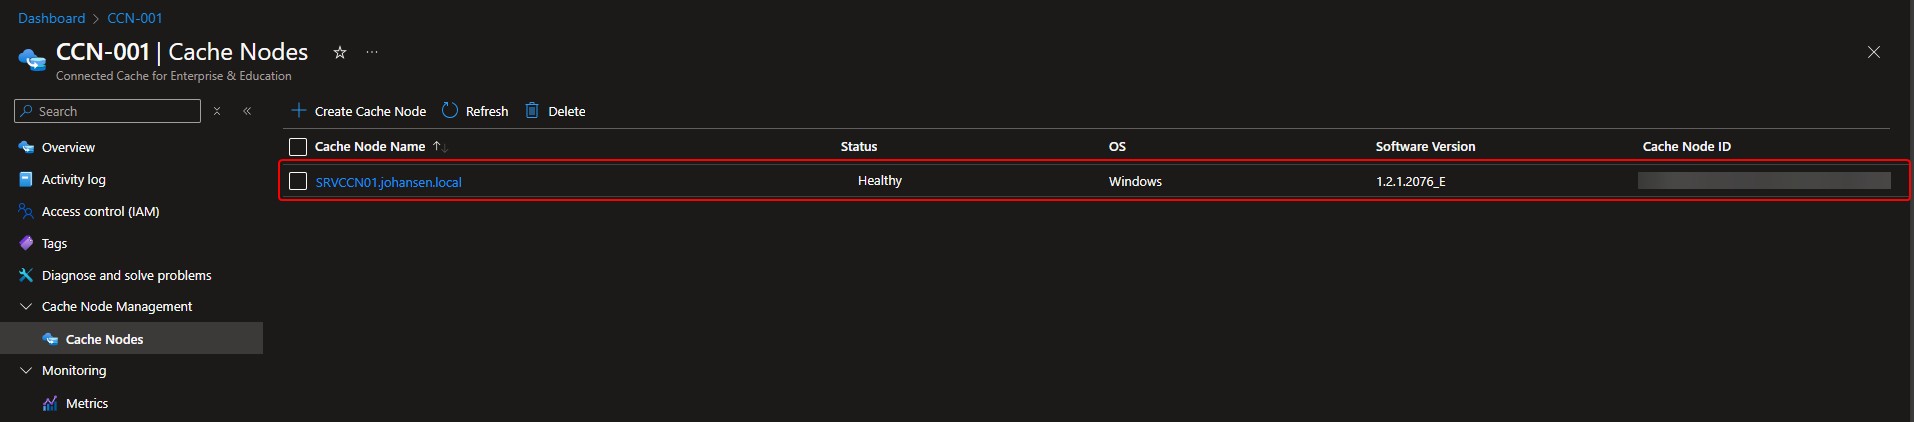
In the Azure Portal you should be able to verify that the status is healthy and the MCC Cache node software currently installed:
Configure the MCC Cache node information in Microsoft Intune
Using Intune, you can configure Delivery Optimization to get content from one or more MCC Cache nodes.
Create a new configuration profile or edit an existing configuration profile, select the Settings Catalog and search for delivery optimization:

Select the DO Cache Host setting

Type the FQDN or IP address of the MCC Cache node, in this case srvcnn01.johansen.local. When multiple FQDNs or IP addresses are configured the Windows device attempt connection in a round robin order, meaning that if the connection to the first MCC Cache Node in the list fails, the Windows device will attempt to connect to next MCC Cache node in the list. If the connection to all MCC Cache node in the list fails, the Windows device will fall back to the Microsoft Content Delivery Network (CDN).
The fallback behaviour can be configured using either the DO Delay Cache Server Fallback Foreground or the DO Delay Cache Server Fallback Background policies:

Verify the Delivery Optimization MCC Cache node information
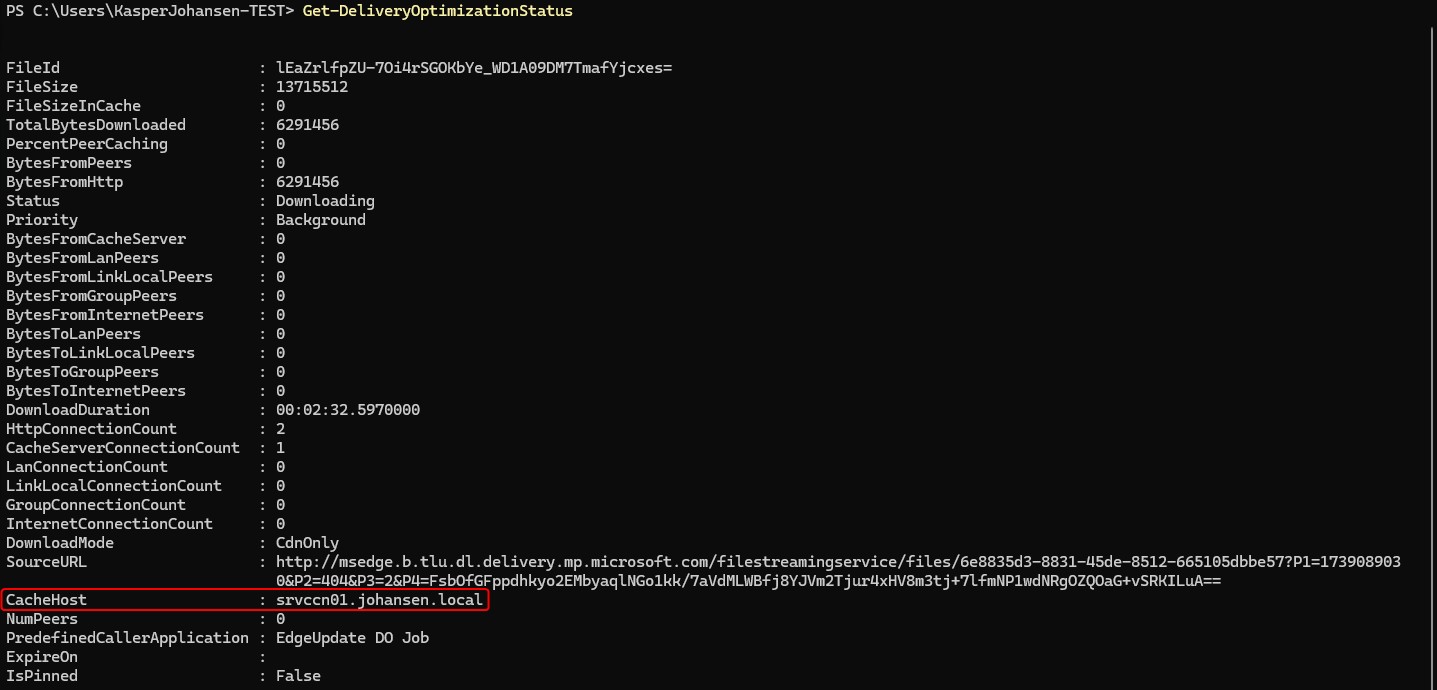
So, how does this look on the Windows device? Launch a Powershell console and type this command:
Get-DeliveryOptimizationStatus
You should see 1 or more MCC Cache node FQDNs or IP addresses:
This concludes the article. Feel free to reach out to me on X or on LinkedIn if you have any comments or questions.